While it’s currently the height of summer in the only hemisphere that (supposedly) matters, where I live in Australia it’s so cold that the state I live in saw snow for the first time in 30 years. When faced with the prospect of driving 2.5 hours to photograph said snow OR hibernating under blankets, I decided to stay in the warmth of my home and research how to make my own snow.
Problem being that no two tutorials use the same method to add snow and some weren’t even convincing so after much experimentation I bring to you the Photoshop-snow-makin’-machine that I like best.
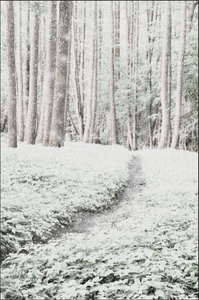
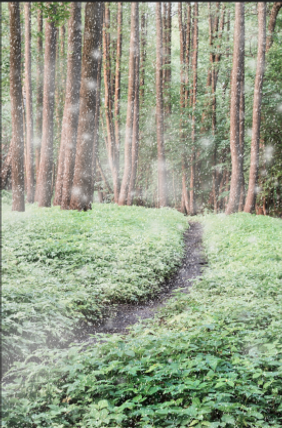
Note: This was the exact workflow I used in my image this week but to demonstrate some of the steps for creating snow I’ve used a forest image from Graphic Stock so it’s easier to see the results.
How to add settled snow
Stock images:
For my image, ‘Rest Stop in Winterglen’ I needed to replace the floorboards and snow was the obvious choice to add to the winter wonderland scene so I downloaded a bunch of snow images from Graphic Stock to use as ground cover. I get that not everyone is comfortable using stock images, just as not everyone is comfortable driving over two hours to photograph their own stock so when you’re weighing up your options sometimes there’s no other alternative. When you’ve found snowy stock that fits your scene, you can mask it in and colour correct to make it fit. And if necessary use Edit>Transform>Perspective or Edit>Transform>Warp to make your stock match the angle of your scene.
Channels:
Channels are brilliant at creating selections and I personally need to use them more in my workflow. So here’s how to use them …

In your layer’s panel you should see a tab labelled ‘Channels’ but if you don’t you can access it with Window>Channels. Now you need to look at each of the colour channels to see which has the most white showing in the areas where you want your snow. Do this by clicking the eye next to Red and Green so only Blue is showing, then turn on Green and turn off Blue etc, etc. When you’ve chosen the channel you wish to work with drag it to the new layer button at the bottom of the layer’s panel to duplicate the channel. If you want to get fancy you can add a curves (Ctrl/Cmd M) or a levels (Ctrl/Cmd L) adjustment to the channel to create more or less white in your image.
Now stay with me here … Ctrl/Cmd click on the channel to turn it into a selection and then switch back to your Layers tab. Create a new layer. Click on the top square of the colour swatch in your tools palette and choose a colour a little under white. Click OK. Go to Edit>Fill and choose Foreground Color. Ctrl/Cmd D to get rid of the selection. Pretty magical right?
If you aren’t entirely happy with the result you can continue to create more snow by pressing Ctrl/Cmd J to duplicate the layer or follow this process again with different colour channels. You can also mask in some snow in areas that you feel need more.
How to create falling snow
There’s two ways to create falling snow – the automated method and the brush method – and to get the best results I recommend a combination of the two.
Automated method
Create a new layer at the top of your layer stack and Edit>Fill with black. Go to Filter>Noise>Add Noise. Make the amount somewhere between 80 and 100%. Choose Gaussian and Monochromatic and click OK.

Add noise
Add a Threshold adjustment layer and drag the slider until you get a nice spacing between your snowflakes. Clip the threshold layer to the noise layer (by alt clicking between the two layers).
With the noise layer selected go to Filters>Pixelate>Crystallize and move the slider to 10. Press OK. Change the blending mode of the layer to Screen to get rid of the black background.
Add some movement to the snowflakes with Filter>Blur>Motion Blur and adjust the angle and the amount to taste. Pull down the opacity of the layer a touch. Done! This gives a nice snowfall to use in the background of your image but it’s all the same size so we don’t want to stop there.
Brush method
I created my own snowflake brush which I considered offering for download but what would you learn then? So let’s do it together! First you’ll want to create two new layers. One will be for medium sized snowflakes and the other will be for large snowflakes to signify snow close to camera. Name your layers ‘medium snowflakes’ and ‘large snowflakes’.
Highlight the medium snowflakes layer, hit b on your keyboard to activate the brush tool and select Photoshop’s standard soft round brush. Press F5 to bring up the brush settings.

Photoshop’s soft brush in brush settings panel
Under Brush Tip Shape start off with a brush about the size of a grain of rice. Make your hardness 0 and your spacing around 230. Under Shape Dynamics, change your Size Jitter to 100%, your Angle Jitter to 10% and your Roundness Jitter to 35%. Under Scattering tick the Both Axes box and take your Scatter all the way up and make your Count about 10. Under Transfer take your Opacity and Flow Jitter sliders all the way up.
Now start to paint in your medium snow using a few clicks because it’s easier to control than dragging your mouse around.
On your large snowflake layer make your brush about the size of a small coin and just dot in some large snowflakes. Save this as a brush preset if you wish to use it for future use by clicking the menu icon at the top right of your brush settings panel and choosing ‘New Brush Preset’.
If you have people in your scene spend some time brushing snow into their hair and clothes. Using the same brush we created, set the size to 25 pixels, scattering to 60 and with this you can draw little piles of snow. It’s time consuming but will really help make your scene convincing.
Lastly, depending on the original colour of the image it might help to add some bluish toning. I chose to add a solid color layer filled with blue, set the blend mode to Hue and reduced the opacity slightly.
Let it snow! Let it snow. Let it snoooow.
About ‘Rest Stop in Winterglen’
Every Christmas in Brisbane, Australia a magical world appears called Lollipop Land. The keepers of Lollipop Land, Jule Barten (visual designer) and Chris Boston (doll designer) were kind enough to let me photograph there after hours last January but I haven’t had the right project for the photos (until now).
I chose to work with their gorgeous Enchanted Forest scene, posing myself on the unicorn (supplied by Natureworks) and taking a 25 shot panorama. I composited in snow and hedges to cover the wooden floor. I added icicles (from Graphic Stock) to the roof and and an ice cave (from DeviantArt) to cover the ceiling. The trees outside of the ice cave are also from Graphic Stock. The dragon was photographed in another area of Lollipop Land but moved into the scene. My favourite part is that the unicorn has a seat built into him so I had to composite in a real horse’s “ass” for realism. I added snow using all the methods above and spent days colour toning the image (only to later delete three-quarters of what I’d done). Lollipop Land is a magical place to spend time (their high teas are great fun) so do visit if you get the chance.


